How to transcribe audio files in Microsoft Word

How to Transcribe Audio Files in Microsoft Word
Transcribing audio files has never been easier. Microsoft Word now includes a transcription feature. This tool converts spoken words into text automatically. It’s efficient, accurate, and user-friendly.
Why Use Microsoft Word for Transcription?
Microsoft Word is widely used for document creation. Adding transcription tools makes it even more powerful. You can convert interviews, lectures, or meetings into text seamlessly. Additionally, it eliminates the need for third-party software.
Key Benefits of Using Microsoft Word
- Ease of Use: No special skills are needed.
- Integrated Feature: It’s built into Word, making it convenient.
- Accurate Results: The tool uses advanced algorithms for precision.
Getting Started with Transcription
To transcribe audio files in Microsoft Word, you need an active Microsoft 365 subscription. Ensure your Word version is up to date.
Step-by-Step Guide to Transcribing Audio
1. Open Microsoft Word
Launch Microsoft Word on your computer or browser. The transcription feature works on both platforms.
2. Access the Dictate Feature
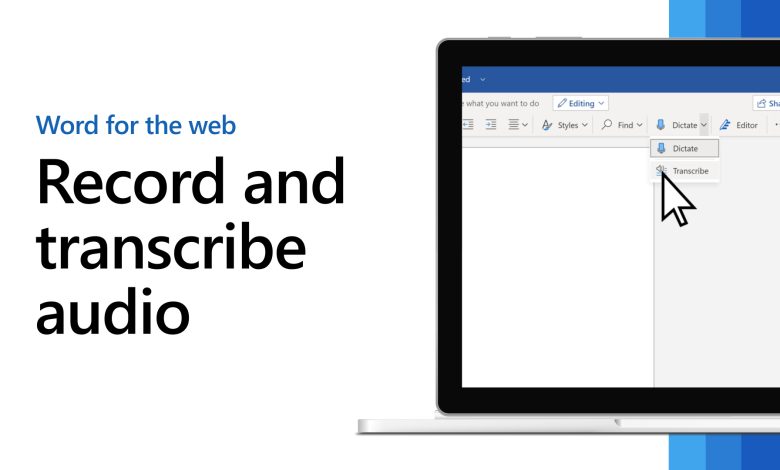
Click on the Home tab. Then, select the Dictate dropdown menu.
3. Select the Transcribe Option
Choose Transcribe from the menu. A side panel will appear.
4. Upload Your Audio File
Click on Upload audio in the transcription panel. Browse your files and select the audio you want to transcribe. Supported formats include MP3, WAV, and M4A.
5. Wait for Processing
Microsoft Word will process your file. The time required depends on the audio length. You’ll see the progress bar during this step.
6. Review the Transcript
Once the transcription finishes, the text appears in the side panel. Each speaker’s words are separated for clarity. You can play the audio alongside the text for verification.
7. Add Transcript to Document
Click Add to document to insert the transcript. You can include timestamps, speaker labels, or plain text.
Tips for Accurate Transcriptions
- Use clear audio recordings.
- Minimize background noise.
- Speak slowly and enunciate words.
These steps improve the transcription quality.
Editing the Transcript
Microsoft Word allows easy transcript editing. Simply click on the text to make corrections. This ensures the final document matches the audio perfectly.
Supported Languages
Currently, Microsoft Word supports several languages for transcription. English is the primary language, but updates are expanding this list.
Advantages Over Other Tools
Microsoft Word offers an integrated experience. Unlike standalone transcription apps, it eliminates the need for exports. Moreover, it’s highly accurate for most general use cases.
Practical Use Cases
Transcribing audio files in Microsoft Word is beneficial for many users:
- Students: Convert lectures into notes.
- Professionals: Document meeting discussions.
- Journalists: Transcribe interviews quickly.
This feature saves time and effort across various scenarios.

Limitations to Keep in Mind
While Microsoft Word’s transcription tool is powerful, it has some limitations:
- It requires an internet connection.
- Processing long audio files may take time.
- Background noise can affect accuracy.
Despite these, the benefits far outweigh the drawbacks.
Exploring Alternatives
Although Microsoft Word is excellent for transcription, specialized apps like Otter.ai or Descript may suit advanced needs. These tools offer extra features like collaboration or advanced editing.
Future of Transcription Tools
With AI advancements, transcription tools are becoming smarter. Microsoft is expected to enhance its features further. More languages, faster processing, and better accuracy are likely in future updates.
Conclusion
Transcribing audio files in Microsoft Word is straightforward. Its built-in transcription tool simplifies the process. From uploading audio to editing transcripts, it’s user-friendly at every step. This feature is perfect for students, professionals, and anyone needing accurate transcripts.


