Extend Your Wi-Fi Range With a Parabolic Reflector

Extend Your Wi-Fi Range With a Parabolic Reflector
Weak Wi-Fi signals can be frustrating. Fortunately, a parabolic reflector offers a simple, cost-effective solution. This DIY project lets you boost your Wi-Fi signal and improve connectivity without spending a fortune.
With a little effort and some basic materials, you can extend your Wi-Fi range significantly. Follow this guide to learn how to create and use a parabolic reflector.
What Is a Parabolic Reflector?
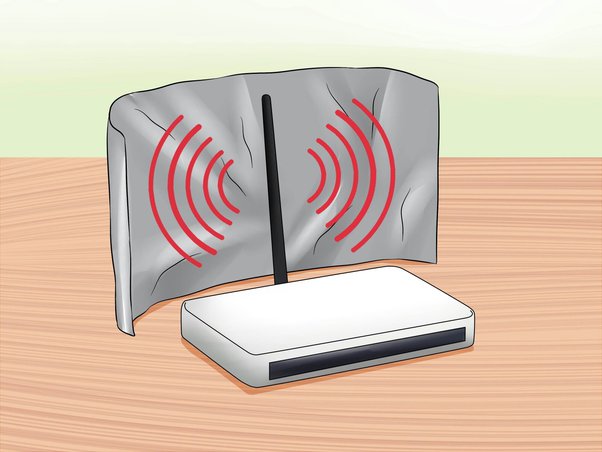
A parabolic reflector is a curved surface designed to focus Wi-Fi signals. By directing the signal in a specific direction, it strengthens the connection where you need it most.
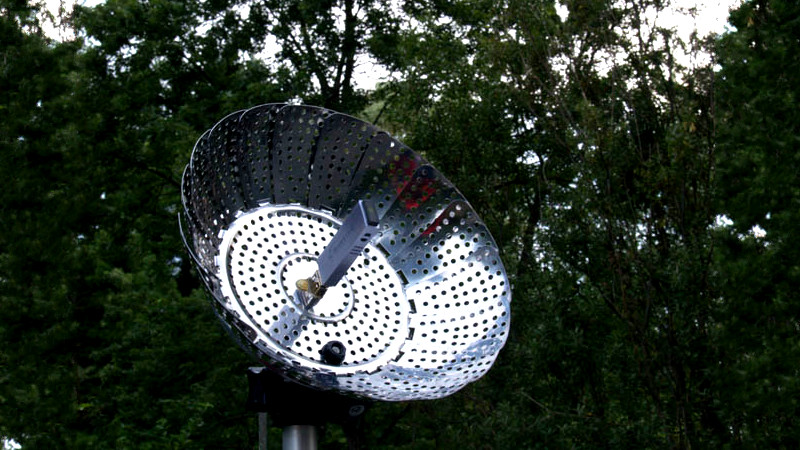
Think of it like a satellite dish, but for your Wi-Fi router. Its reflective surface captures and redirects waves, improving range and reducing signal loss.

Why Use a Parabolic Reflector?
Dealing with dead zones or weak signals can interrupt your online experience. A parabolic reflector offers several key benefits:
- Better Signal Strength: It focuses the Wi-Fi signal in a targeted area.
- Affordable Solution: You can make it with items you already have at home.
- Environmentally Friendly: It reuses materials, reducing waste.
- Simple to Build: No technical expertise is required.
Materials You’ll Need
To get started, gather the following items:
- Aluminum foil or any reflective material.
- Sturdy cardboard or thin plastic sheets.
- Scissors or a utility knife.
- Glue, tape, or staples.
- Your Wi-Fi router or antenna.
How to Build a Parabolic Reflector
Step 1: Create a Template
First, search online for a parabolic reflector template. Download and print it on standard paper. Once printed, trace the template onto a piece of cardboard or plastic. Carefully cut along the traced lines.
Step 2: Add a Reflective Surface
Next, cover one side of the cutout with aluminum foil. Smooth out any wrinkles to ensure an even reflective surface. Secure the foil with glue or tape to keep it firmly in place.
Step 3: Assemble the Reflector
Now, fold the cutout along the marked lines to form a parabolic shape. Use staples, glue, or tape to attach the edges and hold the shape securely.
Step 4: Position the Reflector
Finally, place the completed reflector behind your router’s antenna. Make sure the curved side faces the area where you need stronger Wi-Fi coverage.
Testing and Adjusting
Once the reflector is in place, test your Wi-Fi signal strength. Use a smartphone or laptop to measure performance in the desired area. Tools like Wi-Fi Analyzer can help provide detailed insights.
If the signal isn’t strong enough, adjust the reflector’s position or angle. Small tweaks can significantly improve performance.
Tips for Optimizing Your Reflector
To achieve the best results, keep these tips in mind:
- Fine-Tune Placement: Experiment with different positions to maximize signal strength.
- Avoid Obstacles: Remove any items blocking the signal path.
- Use High-Quality Materials: Smooth, reflective surfaces yield better results.
- Try Different Shapes: If possible, experiment with various sizes or shapes for better performance.
Advantages of a Parabolic Reflector
This simple device offers numerous benefits, including:
- Focused Coverage: It directs the Wi-Fi signal exactly where you need it.
- Minimized Interference: Limits the signal from spreading in unwanted directions.
- Cost Savings: Eliminates the need for expensive extenders or routers.
- Customizability: You can adjust it to suit your unique setup.
Addressing Common Issues
Problem: Minimal Improvement
If you notice little to no improvement, check the reflector’s alignment. Ensure it faces the correct direction and adjust as needed.
Problem: Signal Loss in Other Areas
Focused signals can lead to weaker connectivity elsewhere. To resolve this, reposition your router or add extenders to cover additional areas.
Problem: Difficulty Assembling
Use sturdier materials if your reflector feels flimsy. Watching online tutorials can also provide helpful visual guidance.
Combining Methods for Better Results
A parabolic reflector works well on its own but can be combined with other solutions for even better coverage. For example:
- Pair it with a Wi-Fi extender to reach distant rooms.
- Reposition your router to a central, elevated location.
- Use a mesh Wi-Fi system for seamless connectivity across your home.
Why DIY Solutions Matter
DIY projects like building a parabolic reflector are rewarding for many reasons. Not only are they cost-effective, but they also teach you new skills. Plus, you can customize your reflector to fit your specific needs.
With just a little time and effort, you’ll see noticeable improvements in your Wi-Fi performance.

Final Thoughts
A parabolic reflector is a simple and budget-friendly way to boost your Wi-Fi range. It’s easy to build, requires minimal materials, and delivers immediate results.
Follow this guide to enjoy stronger, faster, and more reliable internet today. Stop struggling with weak signals, and take control of your connectivity.


