Windows 11 has an easy tool for screen recording?

Did You Know Windows 11 Has an Easy Tool for Recording Screencasts?
Screen recording is a feature that many users find essential. Whether you’re creating tutorials, capturing gameplay, or saving a live session, having the right tool makes all the difference. With Windows 11, Microsoft has introduced a built-in screen recording feature in the Snipping Tool. This addition eliminates the need for third-party software, making it simpler for users to capture their screens.
In this guide, we’ll explore how to use this tool, its key features, limitations, and tips for getting the best results. You’ll also find suggestions for alternatives if you need more advanced options.

Why Choose Windows 11’s Screen Recorder?
Many users have long requested a native screen recording option in Windows. Previously, this required installing third-party software or relying on workarounds. Now, Windows 11’s built-in feature makes the process more seamless.
Key Benefits
- Convenience: Pre-installed and ready to use without any additional downloads.
- Ease of Use: A simple interface ensures accessibility for all skill levels.
- Quick Saving: Automatically stores recordings in your Videos folder.
- Focused Recording: Allows selection of specific areas for more precise captures.
These benefits make it a great choice for quick and straightforward screen recording tasks.
Step-by-Step Guide to Using the Screen Recorder
Step 1: Launch the Snipping Tool
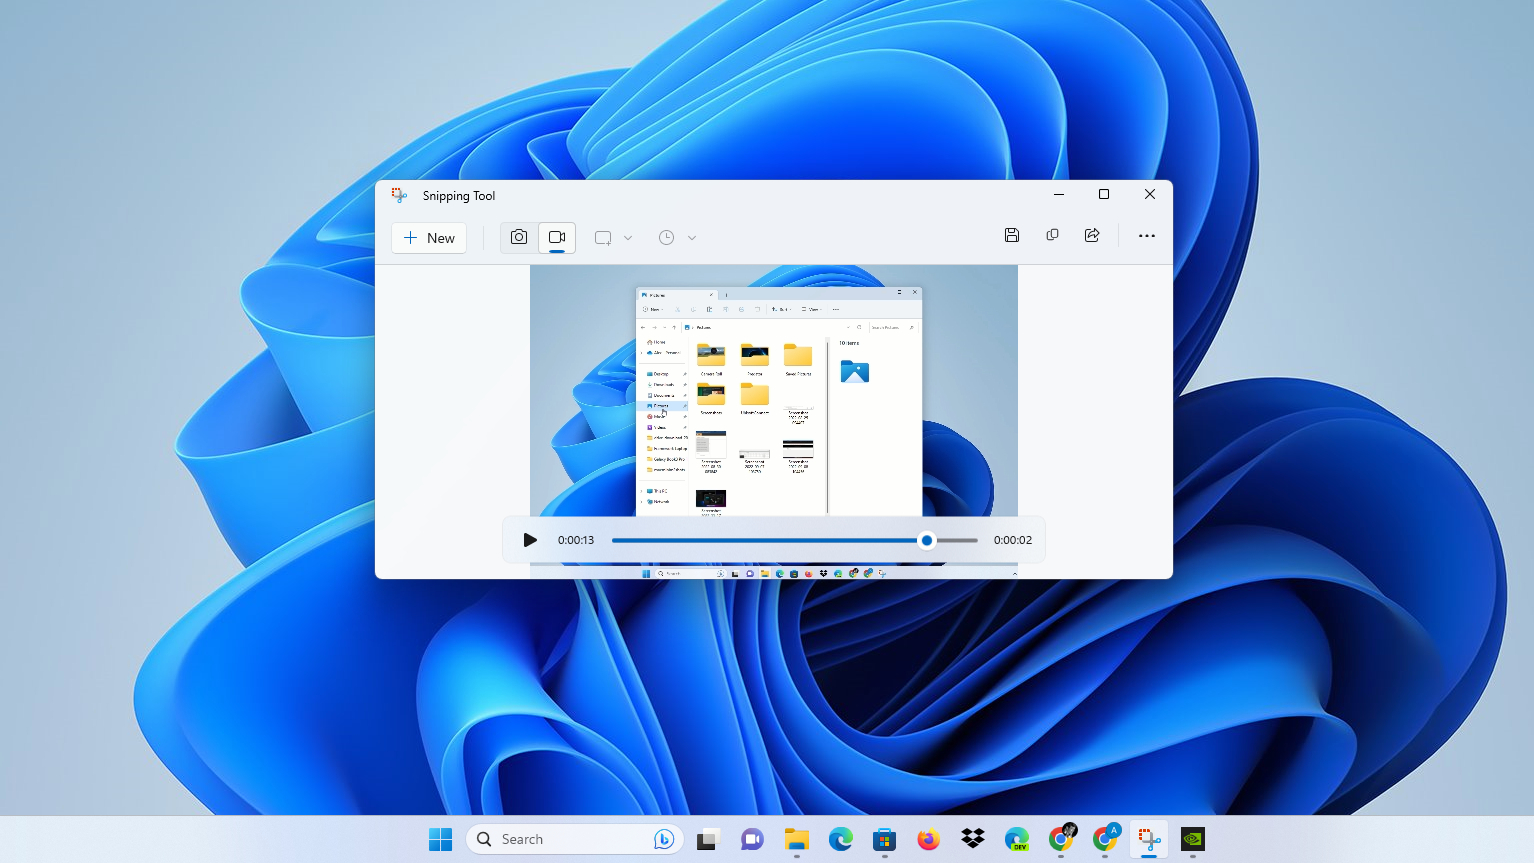
Begin by pressing Win + S to open the search bar. Then, type Snipping Tool and click to open it.
Step 2: Select Recording Mode
Inside the Snipping Tool, locate and click the Record button in the toolbar. Switching to this mode prepares the tool for screen capture.
Step 3: Choose Your Recording Area
Next, use your cursor to draw a rectangle around the area you want to record. Selecting a specific area ensures clarity and avoids unnecessary distractions.
Step 4: Start Recording
After setting up the area, click Start to begin capturing your screen. Perform the actions you wish to document during this time.
Step 5: Stop and Save
When finished, click the Stop button. The recording is automatically saved in your Videos folder, ready for use.
By following these steps, you can easily create high-quality screencasts without extra tools.
Features That Make It Stand Out
This screen recording feature is designed to handle basic tasks efficiently.
1. Customizable Recording Area
Unlike full-screen recorders, this tool lets you capture only the relevant portion of your screen.
2. Lightweight Performance
It runs smoothly, even on systems with limited resources.
3. Automatic Saving
There’s no need to manually locate or save your recording—it’s all handled for you.
Together, these features simplify screen recording for everyday users.
Things to Consider
Although the tool is helpful, it’s not without its limitations.
- No Audio Recording: Unfortunately, the recorder doesn’t capture system or microphone sound.
- Lack of Editing Options: Unlike advanced software, it doesn’t include trimming or annotation features.
- Limited Formats: Files are saved in standard formats without customization.
For users needing advanced features, third-party tools may still be necessary.
Tips for Better Recordings
Improving the quality of your screencasts is easy with a few adjustments.
- Keep the Screen Organized: Close unnecessary windows to reduce distractions.
- Test Before Recording: Run a quick test to ensure the tool captures as expected.
- Pair with an Audio Tool: If sound is essential, use a separate app to record audio.
- Update Your System: Ensure Windows 11 is fully updated for the best performance.
By implementing these tips, your recordings will look more polished and professional.
Alternatives for Advanced Needs
If the Snipping Tool doesn’t meet your requirements, there are several alternatives available.
1. Xbox Game Bar
This built-in Windows tool records screens with audio. Simply press Win + G to launch it.
2. OBS Studio
OBS Studio is a free, open-source software offering advanced recording and live-streaming features.
3. ShareX
Known for its customizability, ShareX supports screen recording, file sharing, and extensive editing options.
These tools provide additional functionality for users with complex recording needs.

Frequently Asked Questions
Q: Does the built-in recorder capture audio?
No, the Snipping Tool’s screen recorder currently doesn’t support audio recording.
Q: Where are recordings stored?
Videos are saved automatically in the Videos folder on your computer.
Q: Is the feature available for all Windows 11 users?
Yes, as long as your system is updated to the latest version of Windows 11.
Why This Feature is a Welcome Addition
Windows 11’s screen recording feature is a significant upgrade for users. It provides a simple, efficient way to create screencasts without relying on external software. While it may not replace professional-grade tools, it’s perfect for quick and basic tasks.
Try it today to simplify your screen recording needs and enjoy the convenience of a built-in solution.


